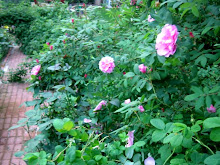
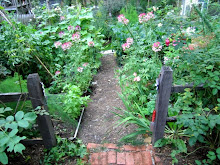
On my recent visit to the New York Botanical Garden, we also made a visit to the Home Gardening Center, where they have home demonstration vegetable gardens. Since last season, they have had to do more pest control around the gardens and I was surprised to some very familiar barriers: 1. Chicken wire around their post and rail fence.
 2. Completely fenced in walls around their new raised beds.
This is exactly what I have had to do this year! Maybe they've been reading my blog for ideas (just kidding).
Related posts: Adding Chicken Wire and Gates to an Open Post and Rail Fence; New Eight Foot Tall Screens Around the Raised Beds
Showing posts with label Pest Control. Show all posts
Showing posts with label Pest Control. Show all posts
Friday, August 07, 2009
A Summer Visit to the New York Botanical Garden (NYBG): Pest Control for the Vegetable Garden


Saturday, August 01, 2009
WSJ: Death by Mint Oil: Natural Pesticides
This article discusses many of the natural and organic solutions that I use in my own garden. From Gwendoln Bounds in The Wall Street Journal:
"Increasingly, well-known insecticide manufacturers, retailers and even professional pest-control services are rolling out solutions derived from natural materials like animals, plants, bacteria and minerals, many of them considered potentially safer to humans, pets and the environment than their synthetic-chemical counterparts. Fueling the move is increased governmental scrutiny over what pesticides we spray in and around our homes, as well as a bid to satisfy more health-conscious consumers—especially women, who typically dictate household pest-solution purchases."
For the full article, click here.
Friday, July 03, 2009
How to Protect the Vegetable Garden from the Groundhog, Part 3: New Eight Foot Tall Screens Around the Raised Beds
One of this season's projects has been to better protect the vegetable garden. As frequent readers of this blog know, enemy number one is the groundhog that lives next door in my neighbor's yard. The extra tall fence around my backyard keeps out the deer and my one year-old cat effectively deters most of the smaller pests--rabbits, squirrels and chipmunks. Unfortunately, I have been ineffective against the groundhog.
.
Part 1 of this year's project was to build a chicken wire fence cover over one of the raised beds with short vegetables. You can read about that here.
.
Part 2 of this year's project was to reinforce the open post and rail fence with chicken wire and build pest proof gates for the three openings. You can read about that here.
.
After parts 1 and 2 of this project, the first two months of the growing season were pest free with no break-ins from the groundhog. Then, last week, he broke in. I don't know how he did it, but he did. My poor beans and cucumbers were mowed down. He even had the audacity to push the chicken wire cover off just enough to squeeze in and help himself to some Russian kale. After having such a good start to the season, and seeing the damage he did in a single visit, I must confess that I thought of just giving up. My son responded with my own words: there is no giving up in gardening. I told my husband that he had to do something.
.
How to Protect the Vegetable Garden, Part 3
. The first part was easy, so easy in fact, I can't believe we didn't think of this before. In the four corners of the chicken wire raised bed cover, we put in long stakes. Now, it cannot be pushed over.
. The second part took a trip to the hardware store and more effort. As you see in the picture, my husband built four 5'x8' screens around each of the other two raised beds that contain the taller vegetables. The two far sides are nailed into the box. The two near sides are tied on with bow ties that can easily be tied and untied for access to the vegetables. Here are some simple instructions that can be adapted to your needs:
a. Buy eight foot 1x2s. We needed four 5'x8' screens for each raised bed, so my husband needed to buy thirty-two for the two raised beds we wanted to protect.
.
b. Cut your 1x2s to the desired length.
.
c. Nail your 1x2s together to make the frames of your screens. My husband put two 1 1/2 inch nails into each corner.
.
d. Cover your frames with deer fence netting. For such a large area, this is much lighter, cheaper and easier to work with than the chicken wire.
.
e. Nail two screens to the sides of your vegetable box where you need the least access.
.
f. Tie the other two screens to the fixed screens with rope that can easily be untied and re-tied for your access.
.
Hopefully, there will not be a Part 4 of this year's story.
Tuesday, June 23, 2009
How to Protect the Vegetable Garden from the Groundhog, Part 2: Adding Chicken Wire and Gates to an Open Post and Rail Fence
When originally conceived, the Children's Garden was going to be a place to grow creative things with the children, like a tee pee made of vines, which we did the first year, and other beds planted and maintained by the children. Thus, the original fencing around the garden was a post and rail fence with three open entryways without gates, which you can see here. The only part of the garden remaining from that original conception is my older daughter's flower garden in the upper left hand corner. Over time, the children's interest in growing vegetables increased, so we replaced the short raised beds with extra-tall raised beds, which you can see and read about here. The extra-tall raised beds improved our vegetable production significantly, but as a result, we also attracted more pests, particularly those hungry, no-good rabbits and groundhogs.
.
At the end of last year, after seeing some of my hard-earned vegetables stolen before we could enjoy them, I resolved to improve the situation for this year. The first step, early this season, was asking my husband to create a chicken wire cover for one of the raised vegetable beds, which you can see and read about here. That has worked great, but it unfortunately does not work for tall vegetables, such as tomatoes.
.
Thus, the second step, completed last month, was asking my husband to pest-proof the fence around the Children's Garden. We thought of replacing the open post and rail fence, but after considering the expense, decided to work with what we had. We covered the post and rail fence with chicken wire and added built-to-fit gates to the former openings. Below are some of the "after" pictures.
.

On the left hand side, you can see some of the asparagus and grape vines that had to be removed from the fence to install the chicken wire. On the bottom, the chicken wire rests on the ground approximately 6+ inches to discourage any attempts to dig under the fence.
.
 In the middle, you can see the simple wooden gate built to fit the space between the two posts. It is built with the same one by two's left-over from building the chicken wire raised bed cover. Because I wanted to keep pests from crawling under the gate, it is actually resting on the ground. Instead of hinges, it has long, easy, on-and-off ties on the top and bottom attached to each of the side posts.
.

On the right hand side, the chicken wire runs from post to post, covering the rails, just like on the left hand side.
.
This enclosure was repeated on the left and top sides of the garden. The right side of the garden is enclosed by a proper fence.
While it is still early in the season, we have not yet had any break-ins.
.
Related posts:
*A Chicken Wire Raised Bed Cover
*A Chicken Wire Raised Bed Cover
Wednesday, April 22, 2009
This Article Really Made Me Laugh: "The Art of Fencing: En Garde!"
From Gerri Hirshey, published in The New York Times:
"EVERY family has its comic tales, and one of our favorites is “Daddy and the Woodchuck.” That Looney Tunes scenario, seared into memory about a decade ago, began with the shrieking of our two children: “Mom, there’s a woodchuck stuck in the fence!”
My husband and I ran out to find the fat fiend about two feet up the vegetable garden fence, with his head and forelegs through the 3-by-5-inch wire mesh and his middle stuck tight. His hind end wiggled desperately. Mommy may have said a few bad words. Daddy grabbed a shovel."
In addition to the entertaining story, there is some good advice on pest control that you can tell came from a real gardener. For the full article, click here.
Sunday, March 29, 2009
How to Protect Vegetables from Groundhogs, Rabbits and Squirrels, Part 1: A Chicken Wire Raised Bed Cover
 Dear Messrs. Groundhog, Rabbit, and Squirrel,
My friends over at Gardening Gone Wild asked me to write to you to discuss the status of our current dispute. While I have such a harmonious relationship with so much of the other wildlife in the garden--the birds, the toads, the salamanders--I regret that our relationship has become so acrimonious, particularly as it relates to the vegetables.
While I am flattered that you like the vegetables as much as (or perhaps even more than) we do, I find that your appetites leave something to be desired, namely leftovers. Last year, the garlic spray kept you away from many of the vegetables, but I was disappointed to still find teeth marks on my vine-ripened tomatoes and zucchinis, not to mention the fruitless pumpkin and watermelon vines whose flowers you devoured. I can no longer bear your rude interruptions. In response, I have asked my dear husband to make a simple, custom-fit chicken wire vegetable box cover to keep you away. What it lacks in aesthetic contribution to the garden, I hope it makes up in efficacy. In the future, please find food elsewhere in the wild or, if I may be so bold to suggest, cultivate your own vegetables.
Best wishes,
Heirloom Gardener
.
UPDATE: Part 2 of this series discusses adding chicken wire around the post and rail fence. Part 3 of this series discusses reinforcements to chicken wire raised bed cover after a break-in.
.
Related posts:
- Advice Wanted: How to Keep Rabbits Out of the Garden
- Keeping the Deer Out of the Backyard: the Deer Fence
- Keeping the Groundhog Out of the Cutting Garden
- Organic Pest and Fungus Control: Garlic Barrier - Yes, It Really Works
- Organic Rose Gardening: Dormant Oil Application for Pest Control
- Organic Pest Control: Colorado Potato, Threelined Potato, and Japanese Beetles
Sunday, February 15, 2009
Pets in the Garden: Five Reasons Why Cats Are Great for Gardeners
 This month's Garden Bloggers' Design Workshop at Gardening Gone Wild is on Pets in the Garden. Of course, I think I have the best cat in the world, but who doesn't think their pet is the greatest? His name is Luna (yes, a little feminine for a tom cat, but we first thought he was a she). For anyone who has any question about whether cats are good for gardeners, here are five reasons why I think cats are perfect for gardeners:
1. Pest Control. My cat has significantly reduced the number of pests in the garden. He is about 18 months old and as he has grown older, his prey has grown larger--he started with small field mice and voles, moved up to chipmunks, and recently caught a squirrel. And for each one he catches, I am sure he scares off many more. I'm hoping he can catch or at least scare off the rabbits, though I'm afraid the groundhog is wishful thinking.
2. Companionship. When out in the garden, my cat follows me around. He quietly observes what I am doing and then wanders off, but always come back.
3. Gentleness. Unlike those other four legged pets that like run through and dig in the beds, my cat is very, very gentle. Yes, he does occasionally chew on some of the ornamental grasses, but pretty much leaves everything else alone.
4. Litter Box Trained. My cat is litter box trained and goes into the house when he has to go. While I've never noticed any unwanted deliveries in the garden, we do keep a cover on the sandbox, just to be safe.
5. Child Friendly. Of course, my children love the cat and the cat is quite friendly with them. He lets them hold him and pet him and doesn't even mind when my toddler tries to boss him around.
Tuesday, January 20, 2009
Organic Pest and Fungus Control: Garlic Barrier - Yes, It Really Works
 Last year, I picked up a pest control recommendation from HRH The Prince of Wales in his book, Elements of Organic Gardening (you can read my previous review here). Garlic Barrier is almost 100 percent garlic oil which can be mixed with water and sprayed on plants, including vegetables. It imparts no garlic taste and it repels both insect and mammal pests. This year, I sprayed it throughout my garden once every other week from April to October.
1. Does garlic barrier repel mammals? In terms of controlling mammals, my main concern was the groundhog which likes to eat both vegetables and flowers. My ultimate test was trying to grow dahlias in unprotected areas of my garden. If you don't know, dahlias are also known as groundhog candy and I have never been able to grow them outside of my fenced-in, groundhog-proof Cutting Garden (you can read about the groundhog-proofing here). This year, I was able to grow dahlias everywhere--in the Front Border, in the Rose Garden, in the Long Border, among other places.
2. Does garlic barrier repel insects? In terms of controlling insects, the garlic barrier significantly reduced the number of Japanese Beetles on the roses throughout the garden. It did not repel the potato beetles on my potato plants, so either it doesn't work against potato beetles or the potato plants need to be sprayed more frequently (you can read about how we controlled the potato beetles here).
3. Does garlic barrier protect against fungal diseases? Because I grow old roses, I do not have a problem with fungal diseases on most of my roses. However, the Bourbons and Hybrid Perpetuals are susceptible to black spot towards the end of the summer. While garlic barrier is not advertised as fungicide, I thought that since it is used as such in many medicinal home remedies it may work as a fungicide on plants. I found very little black spot compared to prior years. I didn't have a control patch of roses, so there my have been other factors.
4. Where can you buy garlic barrier? Unfortunately, garlic barrier is not readily available at my local nurseries. I was able to purchase it online from Gempler's, a great source of all sorts of gardening and other supplies: http://www.gemplers.com/shop/garlic-barrier. I purchased the one gallon container which lasted the entire season. From Gempler's: "Protect your plants and ornamentals from pest damage with easy-to-use Garlic Barrier. 100% natural deer repellent, rabbit repellent, rodent and insect repellent."
Thursday, June 05, 2008
Garden Vigilantes: Peter Rabbit Must Die
As a follow-up to my prior posts on deer, groundhog and rabbit control, the New York Times has a humorous article today on garden vigilantes entitled "Peter Rabbit Must Die" about peace-loving, tree-hugging gardeners becoming enraged, bloodthirsty critter killers, complete with a serious recipe for Woodchuck au Vin.
Wednesday, June 04, 2008
Organic Pest Control: Threelined Potato Beetles, Colorado Potato Beetles, and Japanese Beetles
I could never imagine spraying inorganic chemical pesticides on vegetables or herbs that I am growing in my own raised vegetable beds. This year, two beetles have started to attack my potato plants. The more numerous of my beetles are the smaller (pictured) Threelined Potato Beetles (Lema trilineata).
 They lay small yellowish eggs (pictured) on the underside of the potato leaves.
 The other, larger beetle is the Colorado Potato Beetle (Leptinotarsa decemlineata).
 These beetles lay somewhat larger, orange eggs (pictured), also on the underside of the potato leaves.
 Organically controlling the beetle population is something that I have taught my children how to do, includes them in the vegetable tending process, and is an activity that they enjoy. Here's how to do it:
1. Fill a jar with soapy water.
2. Hold the jar under any beetles that you see.
3. If you bring your hand close to a beetle, it will have a natural flight response of dropping to the ground--or in this case, into your jar.
4. Once they fall into the soapy water, they lose the ability to fly and quickly sink to the bottom; in 5-10 minutes, you can rid yourself of dozens of these pests.
5. As for the eggs, check the undersides of your leaves; I find them sticky and difficult to remove, so I just tear off the leaves and stick them in the water too.
Side note: This method also works on the Japanese Beetles (Popillia japonica) that attack my roses in July.
Friday, May 09, 2008
What I've Learned About Growing Tulips in New Jersey: Protecting from Squirrels and Deer, Planting in Clay Soil, and Creating Colorful Combinations
 One of my favorite spring flowers at this time of year is the tulip. Because of the squirrels, deer, and clay soil in my area of New Jersey, few of my neighbors grow tulips, but it can be done. Here are some lessons that I have learned over the past few years on growing these beautiful flowers in my less than ideal conditions. For me, it has been well worth the effort.
~
1. Protecting Tulips from Squirrels and Deer. In the fall, to protect the bulbs from being eaten or dug up by hungry squirrels, I soak them in deer repellent before planting. In the spring, to protect the tulips from being nibbled by the deer (my friend calls them rodents with antlers), I then regularly spray them with deer repellent as soon as the bulbs begin to emerge.
~
~
2. Growing Newer and Heirloom Tulips in Clay Soil. Because tulips naturally like dry, warm summers, there is a big difference between the newer varieties that have been bred mainly for commercial cutting and the heirloom varieties that were bred to actually be grown in people's gardens.
~The newer varieties spoil if I keep them in my moist, clay soil year-round. To over-summer them, I remove the bulbs after the show is over to a less prominent area of the garden so the foliage can continue to make energy for the bulb. Once the leaves have died down naturally, I dig them up and store them in a dry cupboard until it's time to re-plant them in the fall.
~ In contrast, the heirloom varieties are much more tolerant of my less-than-ideal clay soil. I find that about three-quarters of them will survive the summers in the ground. In the areas where I grow them, like the Rose Garden (pictured), I simply plant enough new bulbs each fall to compensate for the expected loss. A mix of orange tulips including General de Wet, Orange Favorite, Princess Irene, Dillenberg are planted with Black Parrot as a dark purple accent.
 ~

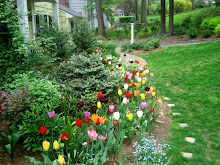
 3. Creating Colorful Combinations of Tulips. Inspired by the Granny Mix offered by Old House Gardens, the last two years I've been mixing up my own tulip combinations to remind me of the old mixtures found in cottage gardens or old time front door gardens. I have ten varieties of tulips chosen for a range of color, height, and form which bloom April and May. My own mix is planted in the front of our house (pictured). It consist of the following tulips: Ballerina, Queen of the Night, Couleur Cardinal, Princess Irene, Kingsblood, Mariette Cum Laude, Maureen, Mrs John T. Scheepers, and Dordogne.
~

 Under a pink flowering crabapple outside the Children's Garden, I planted Christmas Dream, Big Smile and Menton. I must say that originally, I did not like the apricot color of Menton, but as it matures it is absolutely beautiful, particularly because it picks up tones in the red foliage of the crabapple as the leaves elongate.
  On Lilac Hill, I planted the String of Pearls combination from White Flower Farm along with Lilac Perfection, Monte Carlo, Blue Diamond, and Violet Beauty. The String of Pearls collection contains Mount Tacoma, Maureen, White Triumphator, Spring Green, and Calgary.
~
Related posts: How to Keep Deer Out of the Backyard
Thursday, April 24, 2008
Advice Wanted: How to Keep Rabbits Out of the Garden
I need some help and advice from my fellow gardeners. I have always had the occasional rabbit in the garden, but nothing too damaging. This year, I have a rabbit infestation and he or she is eating everything in sight. I wasn't sure who the culprit was, but then I saw the rabbit shamelessly eating my new plants in broad daylight. From what I've read, it seems that the options are guns (not practical in the suburbs), fences, traps (my husband's weekend assignment), dogs/cats (not an option right now), and repellents (I am currently spraying both commercial and home-made repellents). Some gardeners on GardenWeb also suggested spreading human hair, sprinkling pepper, and planting plants they do not like, such as nepeta (catmint). Does anyone have insight into which of these or additional suggestions will work?
Update April 25, 2008: May Dreams Gardens has a lot of experience with rabbits and suggests sprinkling cayenne pepper on the plants that need protection.
Update May 10, 2008: Thank you all for the suggestions--some of them are working. First, I sprinkled the cayenne pepper on the most susceptible plants and the rabbits are staying away from them. Second, I captured my first rabbit in a rabbit trap baited with one of their favorite foods--clover.
Related posts: Keeping Groundhogs Out of the Garden, Keeping Deer Out of the Garden
Friday, March 21, 2008
Gardening Blogs and Groundhog Control: Garden Desk and Veggie Gardening Tips
In my ongoing research on how to fight my the battle with my next door neighbor's groundhog, I came across two blogs from experienced organic vegetable gardeners: Garden Desk (http://www.gardendesk.com/) and Veggie Gardening Tips (http://www.veggiegardeningtips.com/).
You can read two of their entertaining and informative groundhog posts here:
Garden Desk tries a scarecrow - http://www.gardendesk.com/2007_08_01_archive.html
Veggie Gardening Tips talks with his groundhog (before trapping him/her) - http://www.veggiegardeningtips.com/conversations-with-a-woodchuck/#comment-55557
*****
Follow-up: Doug over at Doug's Green Garden (http://blog.douggreensgarden.com/) just gave me another "organic" suggestion (no guns, poisons or traps) that we'll have to try -
http://www.beginner-gardening.com/groundhogs.html
Monday, March 17, 2008
Maintaining a Pebble Path and Keeping the Groundhog Out of the Cutting Garden
 It was a wonderful day in the garden. The weather was warmish in the sun and there was very little wind. My husband and I worked today on the path in the Egg Garden that leads to the Cutting Garden. First, we added more pebbles--ten fifty pound bags or river stones--which is an annual necessity to maintain a good looking pebble path. Then, we replaced the temporary groundhog deterrent I had put down last year at the gate.
 In the Cutting Garden, I grow some of the groundhog's favorite foods: Queen Anne's lace, purple cone flower, and phlox. Knowing this, when I created the Cutting Garden, I dug around the border of the fence about two feet deep to install a chicken wire barrier which the groundhog couldn't get through. You can see some of this chicken wire sticking up out of the earth in the picture above.
However, one spot was left without the barrier: the area where the gate goes into the garden. It took a few years, but the groundhog, who lives next door, discovered last year that he could dig under the gate. Looking for some immediate protection, I simply pegged a piece of chicken wire on the ground under the gate extending one foot on each side. I suppose he found enough food elsewhere that he didn't take the effort to dig underneath this barrier, but it had two problems: it was not attractive and it easily caught on the gate or your foot as you passed through.
 Our project today was to replace the temporary chicken wire with three rows of six by six inch terracotta blocks that we were using for stepping stones in other places in the garden. While digging the space for the new barrier, I discovered more terracotta blocks and chicken wire that I must have buried in an earlier attempt. We placed the new blocks level with the fence (almost touching) over all the existing material for extra protection.
I don't know why it took me so long to do this. Everything looks a lot neater now and I will no longer have to worry about tripping as I leave and enter the garden.
~
For a picture of the groundhog barrier around my vegetables, click here:
http://heirloomgardener.blogspot.com/2007/12/raised-vegetable-beds.html
~
For a prior post on the path to the Cutting Garden, click here:
http://heirloomgardener.blogspot.com/2008/01/egg-garden-path-makeover-replacing.html
~
For a prior post on keeping deer out of the backyard, click here:
http://heirloomgardener.blogspot.com/2007/12/keeping-deer-out-of-backyard-deer-fence.html
Wednesday, March 05, 2008
Organic Rose Gardening: Dormant Oil Application for Pest Prevention
Dormant oil application to my roses is the most important pest prevention task for me as an organic rose gardener. The dormant oil is horticultural oil diluted in water. Horticultural oil is available at most nurseries. As a dormant spray, the horticultural oil is less diluted than it is when its used after plants have leafed out.
The importance of the horticultural oil for the organic rose gardener is that it suffocates many pest and their eggs before they become active as the weather warms up. It's good as a control for aphids, spider mites, scale, sawfly, and thrips.
The dormant oil should be applied all over the canes of the roses. The easiest time to do it is after pruning because all the unnecessary wood has been removed; but, if you will not complete your rose pruning until the leaves have already begun to emerge, do it now.
The only brand that I know of is Bonide All Seasons Horticultural & Dormant Spray Oil (see photo below).
For related posts on Rose Pruning, see:
http://heirloomgardener.blogspot.com/2008/02/how-to-prune-roses-part-i-introduction.html
http://heirloomgardener.blogspot.com/2008/03/how-to-prune-roses-part-ii-old-rose.html
Sunday, December 23, 2007
Q: How Do You Keep Deer Out Of The Backyard? A: The Deer Fence
 Chatham, New Jersey is overrun by deer. It is not uncommon to see shameless groups of deer grazing in our neighbors' yards or strolling down the street. The first victims are the deer's favorites--like ewe hedges, hostas and hydrangeas. By the end of the season, their appetite expands to include some of the deer resistant plants (so called by our local nursery), such as cone flowers and shasta daisies.
In order to keep the deer out of our backyard, we have installed a six foot tall wooden fence. For added protection, the fence posts (four by fours) are ten feet tall and strung with very strong, weather-resistant, plastic-coated wiring. There are three rows of wire above the fence, each spaced about one foot apart.
Aesthetically, the wiring is virtually invisible from a distance and does not take away from the beauty of the garden as some traditional deer fences do. In addition, we have topped many of the posts with bird houses.
Saturday, December 01, 2007
Vegetables and Herbs: How to Build Raised Vegetable Beds (on a Slope/Hill)
In my children's garden, my children and I grow vegetables in addition to flowers. For the last two years, we used the same raised bed construction that I used in the side garden:
http://heirloomgardener.blogspot.com/2007/11/creating-space-for-garden.html
These were short raised beds constructed with six inch wide ipe wood. You can see a picture of one of these beds below from last summer with heirloom lemon cucumbers:
The rabbit fencing around the cucumbers was to keep the resident groundhog from eating the cucumbers in the same way he did the tomatoes.
Towards the end of the summer, we visited New York Botanical Garden's Home Gardening Center (http://www.nybg.org/hgc_online/hgc_onsite/) and were inspired by their raised beds that were significantly taller than the ones we had constructed. Thus, once we had harvested the last of our cucumbers and zucchinis, my husband deconstructed the old beds and built the new ones you see below:
Ipe was too difficult to work with and costly, so we made these out of cedar wood. We purchased standard six by one inch, un-treated ten foot planks and had them cut in half. Each box (two of three are pictured) is made of three planks on three sides and four planks on the fourth side because our entire property is on a slope. Two additional boards are placed on top on either side to create a place where you can sit, place tools, or when the vegetables have grown, stand.
We filled the bottom of the boxes with compostable garden waste. On top, we added a mix of composted cow manure, Bumper Crop and top soil. Then, to protect the soil, we sowed a cover crop of winter rye that I purchased from Johnny's Seeds (http://www.johnnyseeds.com/). The winter rye will be turned over in the spring adding even more organic material to the soil.
The overall result was a neater looking garden that will hopefully produce an even more robust crop next year.
*****
For a follow-post on organically preparing the soil for planting, click here:
http://heirloomgardener.blogspot.com/2008/03/raised-vegetable-beds-organically.html
Subscribe to:
Posts (Atom)
Blogflux