Showing posts with label Garden Planning. Show all posts

Wednesday, April 30, 2008

Garden Bloggers' Design Workshop: Heirloom Gardener's Four Year Makeover of Her Front Garden - How to Improve Boring Suburban Landscaping

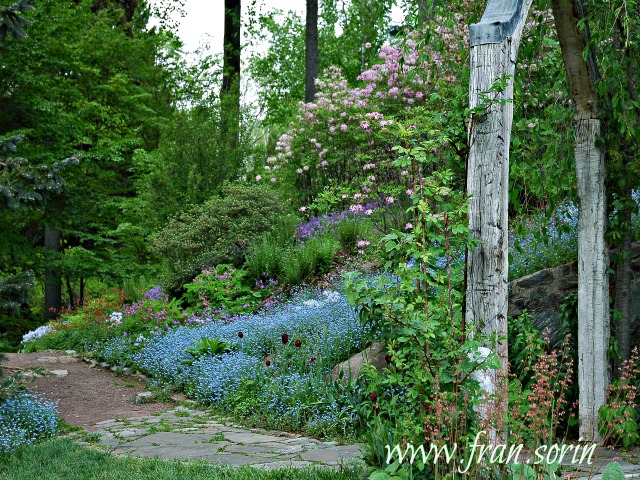
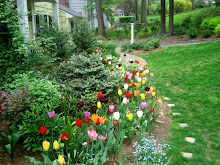
April's Garden Bloggers' Design Workshop on Front Yard Gardens is very timely for me seeing that my spring project was to complete the four year redesign of our front garden, which is made up of the Front Border immediately in front of the house and, standing in front of the house to the immediate left, the Egg Garden.

When we moved into our house, the front garden had the usual foundation plantings: evergreen trees and shrubs with two flowering trees for color. It was dull, static, and uninspiring. The first three pictures show the front border before I began replanting it.
.
.
.
.
.
.
.
.
.
.
.
.
.
To my neighbors' amazement, I proceeded to take out the whole thing and replant it myself. The first year, I replanted the existing borders and created the Egg Garden. The existing borders had three problems: they did not change with the seasons--summer looked the same as fall and spring, and winter was only slightly different; some of the plants had grown so large that they covered windows and were out of proportion with the house; and the borders needed very little maintenance which meant there was little gardening to be done.
~
I started by removing the large problem plants: the huge rhododendron which was out of proportion with our two-story colonial, the two amorphous evergreen cones flanking the front door, and a weeping cherry which obscured the windows of the library. Then I took away anything that was poorly suited for the site, like the leucothea in full sun, or that did nothing for the border, like a deformed Ceris 'Forest Pansy.' Next, I improved the soil by adding four inches of mushroom compost. Finally, I began replanting with small trees, shrubs, perennials, annuals, vines, grasses, and bulbs. I also added a bird feeder.
~
The Egg Garden was created almost entirely from the space that was formerly occupied by the rhododendron and is bordered in the back by the fence and arbor that enclose the Cutting Garden. Small six-by-six stepping stones through the grass connected the front walkway to larger, but not large enough, twelve-by-twelve inch stepping stones through the Egg Garden to the Cutting Garden.


.
.
.
In the second year, I expanded both the Front Border and the Egg Garden, and spent time planting both more densely. I also decided to remove the bird feeder which seemed more appropriate in the backyard. In its place, I installed a tutuer on which I decided to grow the rose Lavender Lass and clematis Blue Bird and Francesca.
.
.
.
.
.
.
.
.
.
.
.
.
.
.
.
In the third year, I added a large pot and a semi circular boxwood hedge in front of the library, to give that area definition and a focal point. In the Egg Garden, I widened the path and replaced the twelve by twelve inch stepping stones with loose gravel. As always, I looked for ways to expand the floral display with more bulbs, clematis, and annuals.
.
.
.
.
.
.
.
.
.
.
.
.
.
.
.
This year, I am completing the final phase of the front border renovation. I replaced the old path of brick pavers with a wider one of irregular blue stone to compliment the other stone work in the garden. I also continue the blue stone stairs on the other side of the driveway. Previously, the steps took you from the mailbox to the driveway through Goldberry Hill. From there, you were expected walk down the driveway and then onto the entrance of the path leading to the front door. No one did this, not even me. One of the cardinal rules of my garden is that there should be paths where people walk.
~
Further on, in place of the small six by six inch stepping stones that connected the front path to the Egg Garden, there are now more appropriately sized two by two foot blue stones. Throughout, I chose irregular blue stone pieces to harmonize with the less formal plantings.
~
The borders in the front were also to be expanded to flank each side of the new stairs. I wanted continuity in plantings around the new steps and those already there, so that it would not be obvious that they were installed at two different times. I chose to use the same plants or plant types so that the steps would echo each other.
~
The project is just about complete now. I will have to see how the plants grow in before I add more to the new plantings. In the fall, I will plant more spring blooming bulbs.


Saturday, April 05, 2008

Garden Planning: A Map of My Gardens

Over the past seven years, I have tried to make the most of every available space in which to garden on our property. In response to some reader requests about how I fit so many different gardens on less than half an acre and for my own garden planning, I asked my husband to draw a map of our property highlighting the various gardens.

The entire space is 100 feet wide and 200 feet deep. The front of our home faces southeast towards the street. The street is the highest point on our property and from there slopes downward. The map is drawn roughly to scale, each square representing five feet.

In the front, gardens welcome visitors as they walk down to our home: Goldberry Hill, the Front Border, and the Egg Garden.

On the side, gardens occupy previously unused space: the Cutting Garden and the Rose Garden.

In the back, gardens border a large open lawn where the children play (clockwise from the Rose Garden): the Children's Garden, the Triangle Garden, the Long Border, the Walled Garden (includes the sandbox and is bordered by the fort), the Winter Border (this year's major garden installation), the Bird Garden, and Lilac Hill. The custom deer fence completely encloses all of these gardens and the Rose Garden.

Related Posts: How to Keep a Garden Journal and Creating Space for a Garden - the Cutting Garden

Monday, March 10, 2008

An Invaluable Tool: How to Keep a Garden Journal


Now is a great time to begin a garden journal if you have not already. I find the garden journal is an invaluable tool to help me keep track of my garden and plan for the future. I started keeping a garden journal about six years ago. Before then, I would keep notes at random on successes, failures, and sources of inspiration. These I would easily misplace and forget about. Keeping a regular journal is easy once you get in the habit of it.

Choosing the Notebook

Choosing the notebook is an important step because the journal has to suit the way you want to use it. Here are some suggestions:

1. I like the blank books with unlined pages. The unlined pages allow me to draw pictures, make notes, create list, and mock up future design ideas.

2. If you are prone to leaving your book out in the rain, I have found waterproof garden notebooks online at Acorn Naturalists (http://www.acornnaturalists.com/).

3. As I always take my notebook with me into the garden, I choose a cover which will not show dirt easily. Frequently, it is right next to me as I'm plant bulbs or annuals, so I can quickly write down what I'm planting and where.

4. As you will probably want to take your journal with you to visit parks, gardens, and nurseries, the size of your journal should easily fit into the pocket, backpack, or bag you're most likely to carry. However, it should also be large enough to keep a year's worth of notes.

5. I avoid spiral bound journals. My first year I had a spiral bound journal which by September was in shambles.

Recording Bloom Times

I begin each January with a new journal. That way if I want to compare how spring looked and felt two years ago, I simply pull out the journal for 2006. At the back of my journal, I keep a list of what is blooming in my garden and in local gardens in my area. This way if I have a lull in the garden or if one part to season seems lackluster as it relates to color, I can look back to see what plants could fill in the gap. I wanted to plant my long border to peak in late August and September. By looking at my bloom record, I was able to choose plants which would peak then. Instead of relying on books and plant tags, I knew when a particular plant bloomed in my immediate locale.

Garden Planning

The journal also helps me keep track of what I plant and where. When writing about a plant, I underline the plant name so that later I can quickly locate notes on a particular plant at a glance. I note where I bought the plant or from whom I received the plant. If I see a plant needs division, I make a note of it for next spring. I sometimes find that plants will grow very differently in my soil which I record for future reference. The things to record are many: pest problems, times of pruning, fertilizer routines, weather, drought, vegetable yields, cultural notes, future improvements, advice from other gardeners, and great nurseries. If you love poetry or observing nature, this is a great place to put your poems and reflections.

In conclusion, keeping a garden journal is one of many enjoyable aspects of gardening. Once you get in the habit of it, you will love it.

Wednesday, February 06, 2008

Garden Color: Inspiration from Chanticleer in Wayne, Pennsylvania

Chanticleer, in Wayne, Pennsylvania, is one of my greatest sources of inspiration as a gardener. It describes itself as 'America's pleasure garden' and that it is. I love Chanticleer because you can tell the staff loves plants and loves to play with them in creative combinations and venues. Everything is done to please and exite the senses.

Color at Chanticleer is as much about flowers as it is about foliage. The combination of various leaf colors, textures, and shapes makes the garden interesting without any thought to flowers.
Purple leafed plants run as a theme through Chanticleer. I love how dark leaves interact with light and add a deep rich beauty which soothes the mind rather than excites.
Over the last several years of viewing Chanticleer, I have added two smokebushes (Cotinus 'Grace' and 'Royal Purple'), Rose glauca, purple phormiums, dark leafed clematis like 'Freda', amaranthus 'Hopi Red Dye' to my garden. The dark color relieves the green and really brings out any silver toned plants nearby. Also, the purple foliage looks great in floral arrangements.
One of my favorite quotations from Christopher Lloyd as it regards planting and border design is that "you should never have to explain what you were trying to do." At Chanticleer, this rings true. All the plantings are dense, rich, and full. The feeling of abundance surrounds you. There is rarely one of anything. Instead, it's large swaths of poppies set against orange wallflowers.
My garden is my small piece of Eden where I can experience this. This year I want to do a combination of yellow anthemis and orange butterfly weed. I know from Chanticleer I'll want to plant more than I think of both.
For more information about Chanticleer, click here: http://www.chanticleergarden.org/
This post was inspired by the "Garden Bloggers' Design Workshop - Colors in the Garden" at one of my favorite gardening blogs, Gardening Gone Wild: http://www.gardeninggonewild.com/?p=698


Wednesday, January 16, 2008

Old House Gardens Nursery & Heirloom Dahlias

My garden planning for next year is in full tilt now. I just received the Old House Gardens email newsletter which I had been waiting for to see what web only dahlias, glads, and cannas will be offered. The dahlia 'Giraffe' was first in my shopping cart.

Old House Gardens--"Antique Flower Bulbs for Every Garden - Unique, Endangered, Amazing!"--is a great source for heirloom bulbs: cannas, dahlias, glads, tulips, daffodils, hyacinths, lillies, and a few diverse others. Every shipment is carefully checked and packed. Nothing which is sub prime gets out. The bulbs come with detailed instructions on planting, forcing, and winter care.

For the summer, dahlias are my favorite cut flower and are super easy to grow. One dahlia tuber produces loads of blooms which keep getting better and better as the season winds down and other plants are calling it quits. Cut flowers mix well in arrangements and hold well in water. The heirloom dahlias offered at Old House Gardens are not the super sized dahlias that are difficult to mix with other flowers, but come in a range from small pompoms to larger 5-6 inch diameter flowers.

Dahlias can be started inside in pots before the weather warms up for an early start. But, seeing that dahlias grow so quickly, I usually wait until the weather has warmed up and plant them outdoors when I plant my tomatoes. I always topdress the soil and incorporate a little compost into the planting hole when I plant my tubers. After they start growing, begin watering them and watch them grow.

The one thing to be vigilant about, however, is staking. When planting put a tall stake in next to the tuber. Don't think it's too tall because in about six weeks you will otherwise be wishing you had. The hollow stems of dahlias break very easily in a summer storm or strong winds, so be careful to begin tying them in when they are about 18 inches tall.

Once blooming, keep deadheading or cutting for the house. The more you cut, the more they bloom.

In the fall, I will post about storing dahlias for the winter.

Wednesday, December 26, 2007

Q. What Do You Do With Rocky Soil? A. Make Dry Laid Walls

In honor of Gardening Gone Wild's Design Workshop on fences and walls, here is a post about a rock "wall" my husband and I created.

In a prior post, I wrote about the disaster which befell us two summers ago when one of our oak trees fell after a storm and the tulip tree growing with it had to be removed subsequently:
This event not only ruined the shade garden I just planted, but also unearthed more rocks than you could believe. Further, the heavy machinery in and out of our backyard compacted the earth and made even more rocks visible on the surface. I always knew my property was rocky seeing that each time I dig a hole I come up with more rocks. But, what to do with so many rocks at one time?

In preparation of redesigning our backyard, I sketched on graph paper the outline of a central lawn bordered by different gardens and play areas for the children. Before finalizing the plan and laying the new top soil and grass seed for the lawn, we used the rocks to demarcate the future lawn and garden areas. It always helps me to transfer my plan on paper to the ground and adjust the plan according to what looks best.

Once we finalized these lines, we decided to relocate all of the now visible rocks from the tree and lawn areas for the safety and comfort of running and walking barefoot. It was at this stage that we decided to make the "wall" that provided a name for the Walled Garden.

We followed none of the rules of laying a dry laid wall, but simply stacked the rocks together in a line. It's not as beautiful as New England's dry laid walls, but its primitive appearance fits with the rest of our garden. All of the rocks have the distinctive orange coloring of all of the iron-rich earth in Chatham, New Jersey and the surrounding area.

For more on Gardening Gone Wild's Design Workshop, click here:

http://www.gardeninggonewild.com/?p=466

Friday, December 14, 2007

Old Farmer's Almanac Gardening 2008 Calendar

I just got my Old Farmer's Almanac Gardening 2008 Calender. I love it. It has wonderful full color illustrations and just enough room to keep your appointments, but not take up too much space.

The best part is the gardening folklore, advice, and hints which are included each month relating to the garden chores, weather, and plants expected that month. On the last page is listed the planting times for an array of vegetables according to your region of the country. The calender also includes a preview of the gardening article for the month which can be read on the Farmer's Almanac website.

Related post: Old Farmer's Almanac Spring Planting Schedule; How to Build Raised Vegetable Beds; and Raised Vegetable Beds - Organically Preparing the Soil for Planting

Garden Planning Before the Catalogs Arrive

In the winter, the garden looks so bare that despite the pictures I've taken from the growing season it's hard to believe that it will all spring back again as full as it was. By January, my memories are clouded and I find myself circling way too many 'must buy' plants for the spring. Beguiled by the beautiful pictures and descriptions, in April you can find me on my porch surrounded by boxes of precious cargo wondering "Where am I going to put all of these?" In addition, I can't help but make forays to the local nurseries adding to my conundrum.

So, last winter I formed a plan to review all the pictures and notes I took during the year. This helped me see gaps in the plantings and under performers. It also reminds me of areas that I can layer the plantings to extend the show. For example, oriental poppies take up a lot of space, but bloom for only a short time and their leaves die back soon afterward. So, I cut the leaves back after they bloomed and plant Abyssinian glads around them. In mid July, the Abyssinian glads begin to bloom. By the time the poppies reemerge in the fall, the glads are ready to be dug up for the winter.

I love to cut flowers to bring in the house or give as gifts. At this time I also think about what plants did I wish I had more of or were there times when I didn't have much for cutting. I also keep track of where I like to plant dahlias and glads which are great cut flowers and add beauty to the garden.

Pictures also help to jog my memory as to where self seeders will fill in the garden, so I don't order plants expecting them to take spaces I've reserved for nature's gifts. In many of my gardens I allow one self seeder to provide an accent: in the front border it's verbena bonariensis; Queen Anne's lace in the Cutting Garden; around the oak in the front garden its cerinthe major; forget-me-nots in the Bird Garden; and annual black eyed susans in the Egg Garden.

Every year I have movers and those to be removed. The movers are either unhappy where they are; I don't like where they are; or their neighbors don't like them. These are listed and I note where they are moving to so that I don't re allot that space to a new purchase. Plants which will be divided are put on this list too because some of the divisions can be used to fill empty areas. Under performers or plants tried, but not liked, are slotted for removal.

At this point I should have a good list of planting spots to think about as I approach my spring order. From then on I keep a master list of all my orders and exactly where they are going. Once the boxes arrive it is quick and easy to plant them where they belong and I can prepare the planting areas ahead of time. This system works pretty well. Yet, there's always room for one more.

How do you plan your ordering? Please share any ideas that you have.

Friday, December 07, 2007

Creating the Rose Garden with a Central Brick Path

After we established the Cutting Garden, there was a narrow portion of our property behind it and next to our deck that was another relatively unused portion of our yard, measuring approximately fifteen feet wide by thirty feet long.

Because this space had full-sun, I thought it was the perfect place for a rose garden. While I have roses in almost every part of the garden, a dedicated rose garden would provide more space for all of the roses that I wanted to grow.

The first picture is taken from the steps of the Cutting Garden looking down the path of the Rose Garden to the Children's Garden.

The main structural element of the Rose Garden is the brick path that you see running through the center. I actually installed the brick path myself, which was a tremendous amount of work that I'm not sure I would want to do again.

After we established the path in the summer, we started to prepare the beds for planting the roses. In the fall, we put down newspaper to kill the grass and covered it with a thin layer of organic matter. In the spring, we dug in significant amounts of composted cow manure and mushroom compost. Then, we planted the roses.

Inspired by the Cranford Rose Garden at the Brooklyn Botanical Garden, I knew that I could fit a lot of roses into a limited space. We now have twenty-seven different roses in the Rose Garden, as well as bulbs and perennials.

Some of the roses are grown on tutuers. The three pictured were purchased from the New York Botanical Garden, which has the best gift shop of all of the gardens I visit:

http://www.nybgshop.org/

For pictures of the Rose Garden in season, click here:

http://heirloomgardener.blogspot.com/2008/01/rose-garden-in-spring-summer-daffodils.html

For information on the creation of the Cutting Garden, see this post:

http://heirloomgardener.blogspot.com/2007/11/creating-space-for-garden.html

Gardening with Children: Creating the Children's Garden

This is a picture of the Children's Garden looking up the hill in winter. Beyond the Children's Garden is the Rose Garden and beyond the Rose Garden is the back gate to the Cutting Garden.

The Children's Garden includes beds that I help the children plant and cultivate: three raised vegetable beds, for which my oldest son (age eight) is the primary gardener, and one flower bed, for which my older daughter (age ten) is the primary gardener.
The boundaries of the Children's Garden were created by installing a post and rail fence within the backyard.

Given the placement of the garden and to allow for maximum play, it has three openings: one to the Rose Garden, another to the Great Lawn, and the third next to the Long Border. The Great Lawn and the Long Border are hyperbole, as the Great Lawn is small and the Long Border is short.

Saturday, December 01, 2007

Vegetables and Herbs: How to Build Raised Vegetable Beds (on a Slope/Hill)

In my children's garden, my children and I grow vegetables in addition to flowers. For the last two years, we used the same raised bed construction that I used in the side garden:

http://heirloomgardener.blogspot.com/2007/11/creating-space-for-garden.html

These were short raised beds constructed with six inch wide ipe wood. You can see a picture of one of these beds below from last summer with heirloom lemon cucumbers:


The rabbit fencing around the cucumbers was to keep the resident groundhog from eating the cucumbers in the same way he did the tomatoes.

Towards the end of the summer, we visited New York Botanical Garden's Home Gardening Center (http://www.nybg.org/hgc_online/hgc_onsite/) and were inspired by their raised beds that were significantly taller than the ones we had constructed. Thus, once we had harvested the last of our cucumbers and zucchinis, my husband deconstructed the old beds and built the new ones you see below:


Ipe was too difficult to work with and costly, so we made these out of cedar wood. We purchased standard six by one inch, un-treated ten foot planks and had them cut in half. Each box (two of three are pictured) is made of three planks on three sides and four planks on the fourth side because our entire property is on a slope. Two additional boards are placed on top on either side to create a place where you can sit, place tools, or when the vegetables have grown, stand.

We filled the bottom of the boxes with compostable garden waste. On top, we added a mix of composted cow manure, Bumper Crop and top soil. Then, to protect the soil, we sowed a cover crop of winter rye that I purchased from Johnny's Seeds (http://www.johnnyseeds.com/). The winter rye will be turned over in the spring adding even more organic material to the soil.

The overall result was a neater looking garden that will hopefully produce an even more robust crop next year.

*****

For a follow-post on organically preparing the soil for planting, click here:
http://heirloomgardener.blogspot.com/2008/03/raised-vegetable-beds-organically.html

Wednesday, November 28, 2007

Creating Space for a Garden: the Cutting Garden

Like many suburban gardeners, one of the hardest things to do is find space for all of the plants that you want to cultivate. One solution is to create gardens in the under-utilized parts of your property.

Like many suburban tracts, each home in my neighborhood has about thirty feet of space between each house. When we moved in, the fifteen feet on our side of the property line included a very large rhododendron, some unattractive evergreen trees, some grass, and a lot of weeds. The only thing we did on this strip of property was occasionally walk from the front yard to the back yard.

After a couple of years, we decided to remove the existing trees and plants and transform the space into a cutting garden. This space measures approximately fifteen feet wide and thirty feet long. We created a garden room by installing a wooden picket fence with an attractive arbor and gate in the front (visible in the first picture from inside the garden) and a simple gate in the back. Because the side yard was also on a slope, we installed a short, one-foot dry laid wall in the back to decrease the grade.

There are three foot beds on either side and a central four foot bed (visible in the second picture). The paths are too narrow at only two feet, but with only fifteen feet to work with, we had to make compromises. The soil was dead, so we dug down about two feet and also created shallow raised beds with ipe wood. Ipe is expensive, but it is far better for your garden than the toxic chemicals in pressure treated wood. Warning: ipe is very hard, which makes it rot and insect resistant, but it also makes it extremely difficult to cut with standard woodworking tools. I had to have my planks cut at the lumber yard.

After digging out the beds and creating the walls of the raised beds, we then added significant amounts of composted cow manure and Bumper Crop. These are now some of the richest beds on our property.

This is now one of the favorite parts of our property. In addition to changing this from unused and unattractive to a place we visit every day, it also produces abundant cut flowers for indoor enjoyment from May through October.

Related Post: Making the Most of Your Space for Gardening - A Map of My Gardens

Search Heirloom Gardener

Google
 

Blogflux

Blog Flux Pinger - reliable ping service. Blog Directory Alltop, all the top stories
Powered By Blogger