Thursday, December 27, 2007

Salve for the Gardener's Winter Blues: How to Grow Amaryllis

As any gardener will tell you, winter is an excruciatingly long season. Trapped in our homes with no active gardening to be done, we plan the next season's gardening projects and count down the days until the glorious spring days arrive and we can get our hands dirty.

Ready to be planted and pre-planted Amaryllis bulbs are readily available--I've even seen them sold at Target and the local grocery store. For a broader selection, I purchase my Amaryllis bulbs from:

http://www.vanengelen.com/

I purchase them in September, as some types sell out by October. As you can see in the picture, they start to bloom around Christmas.

If you buy ready to be planted bulbs, they can be placed in shallow pots with the tops exposed. I cover the exposed soil with moss to enhance the pot's appearance. Over the next couple of months, it is pleasing to watch the Amaryllis grow and flower. Each stem produces three to four blossoms.

After the flowers have bloomed, I dispose of the bulbs. By this time, the other bulbs that I have chilled--daffodils, hyacinth, tulips--will be ready to replace the spent Amaryllis.

While it is possible to keep your Amaryllis bulbs so that they flower the next season, I neither have the space nor the time to do this once spring arrives.

For a prior post on forcing bulbs and branches, see:

http://heirloomgardener.blogspot.com/2006/02/forcing-forsythia-and-bulbs-of-all.html

Wednesday, December 26, 2007

Q. What Do You Do With Rocky Soil? A. Make Dry Laid Walls

In honor of Gardening Gone Wild's Design Workshop on fences and walls, here is a post about a rock "wall" my husband and I created.
In a prior post, I wrote about the disaster which befell us two summers ago when one of our oak trees fell after a storm and the tulip tree growing with it had to be removed subsequently:
This event not only ruined the shade garden I just planted, but also unearthed more rocks than you could believe. Further, the heavy machinery in and out of our backyard compacted the earth and made even more rocks visible on the surface. I always knew my property was rocky seeing that each time I dig a hole I come up with more rocks. But, what to do with so many rocks at one time?

In preparation of redesigning our backyard, I sketched on graph paper the outline of a central lawn bordered by different gardens and play areas for the children. Before finalizing the plan and laying the new top soil and grass seed for the lawn, we used the rocks to demarcate the future lawn and garden areas. It always helps me to transfer my plan on paper to the ground and adjust the plan according to what looks best.

Once we finalized these lines, we decided to relocate all of the now visible rocks from the tree and lawn areas for the safety and comfort of running and walking barefoot. It was at this stage that we decided to make the "wall" that provided a name for the Walled Garden.

We followed none of the rules of laying a dry laid wall, but simply stacked the rocks together in a line. It's not as beautiful as New England's dry laid walls, but its primitive appearance fits with the rest of our garden. All of the rocks have the distinctive orange coloring of all of the iron-rich earth in Chatham, New Jersey and the surrounding area.

For more on Gardening Gone Wild's Design Workshop, click here:

http://www.gardeninggonewild.com/?p=466

Sunday, December 23, 2007

Q: How Do You Keep Deer Out Of The Backyard? A: The Deer Fence

Chatham, New Jersey is overrun by deer. It is not uncommon to see shameless groups of deer grazing in our neighbors' yards or strolling down the street. The first victims are the deer's favorites--like ewe hedges, hostas and hydrangeas. By the end of the season, their appetite expands to include some of the deer resistant plants (so called by our local nursery), such as cone flowers and shasta daisies.

In order to keep the deer out of our backyard, we have installed a six foot tall wooden fence. For added protection, the fence posts (four by fours) are ten feet tall and strung with very strong, weather-resistant, plastic-coated wiring. There are three rows of wire above the fence, each spaced about one foot apart.

Aesthetically, the wiring is virtually invisible from a distance and does not take away from the beauty of the garden as some traditional deer fences do. In addition, we have topped many of the posts with bird houses.

Saturday, December 22, 2007

Common Witchhazel Blooming in December

When driving to my friend P's house (also in Chatham, New Jersey), I almost ran off the road when I noticed Common Witchhazel (Hamamelis virginiana) in full bloom. I'd never noticed it before, as it is a small tree in the corner of her yard--but now that it's in bloom, you can't miss it.

My friend P was kind enough to give me a branch that came off during the recent ice storm to enjoy indoors.

From this branch, I have taken a few small cuttings and put them in the refrigerator, so I can try to propagate them in the spring. If I can't, I'll have to find one to mail order.

Christmas Decorations from the Garden

When decorating our home for Christmas, I try to bring some of the garden indoors. Below are some examples.

In the first picture of the staircase, I have paired some of my Ballerina and Dog Rose hips with the Princess Pine I purchased from my local nursery and the Leland Cypress clippings from my backyard.

In the second picture of the chandelier, I have placed additional Leland Cypress clippings.


Cut Heavenly Bamboo (Nandina)

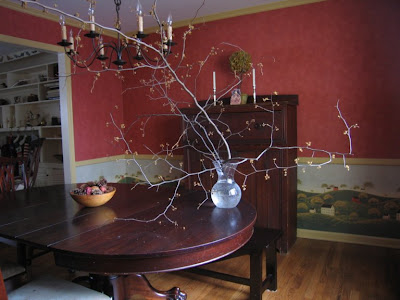
As a follow-up to my previous post on Heavenly Bamboo, here is a picture of what it looks like as a cut flower.

I often use glasses, jars and other objects as vases. The vase in this picture is actually a small glass.

For the previous post, click here:

http://heirloomgardener.blogspot.com/2007/12/heavenly-bamboo-nandina-in-december.html

Wednesday, December 19, 2007

Heavenly Bamboo (Nandina) in December

Next year I plan to plant more heavenly bamboo. When most every other non-conifer has lost its leaves, nandina looks as fresh as it did two months ago. The red berries are beautiful and cuttings of nandina last for weeks in water.

The plants are pretty undemanding. They will grow in sun or part shade, do not require feeding, and have modest water requirements. They grow 3-5 feet tall and will spread with time. Nandina does have a tendency to become leggy, so good pruning in spring helps stimulate growth lower down on the plant.

Tuesday, December 18, 2007

The Garden in Winter by Suzy Bales

The winter is my time for armchair gardening. Also, during the winter I always give the garden a hard look to see how I can improve it next spring to increase its winter beauty. I was thrilled to read Suzy Bales recently published book The Garden in Winter. I have read many books on winter gardens, but this is the best so far because of the breath of the information. It covers not only the garden, but indoor decorations made from material cut from the garden and various other winter occupations.

As expected Bales highlights various plants that add to the seasonal beauty of the garden, but goes beyond the laundry list to include her own experience in growing these plants. She grows Petasites japonicus, for example. Although, the plant blooms in very early spring and has distinctive leaves, its size and spreading habit allows Bales to only recommende it with caveats.

Throughout the book are many short essays on topics related to winter which are very interesting and informative. In these essays, Bales profiles many people and gardens that make use of the season in spectacular ways. For example, she interviews Les Brake, a gardener in Willow, Alaska, who is passionate about making sculptural ice lanterns to fight off the winter doldrums. His work is amazing and inspiring.

I love snowdrops. Every winter when I walk the garden I look with anticipation to see if they have begun to come up. I was thrilled to find Bales profile on Temple Nursery which specializes in hard to find and rare snowdrop cultivars sold in the green.

Sunday, December 16, 2007

Container Gardening: Autumn Cleanup and Rosemary in Bloom

In autumn, before the first frost, I move some of my non-hardy plants grown in containers from my deck into more sheltered locations.

Some, I move into the garage so they can go dormant under milder conditions, like my fig tree and a few of my roses. Others, like the elephant ears, I move into the house. The herbs, except the chives and thyme which are hardy and can be left outdoors, I have usually treated as annuals.

This year, I brought my rosemary plant indoors and, to my surprise, it started blooming. It is now covered with the small, light purple flowers that you see in these pictures.


Gardening with Children: How to Build a Children's Playhouse (the Fort)

As a gardener with five children, I am always thinking of ways to make the garden a fun place to play. I had the idea of building a playhouse, or as my husband likes to call it, a fort.

When he was younger, my husband had a fort in the field behind his house. It was crudely built, but the four plywood walls, flat roof, and squeaky door was the center of play for many of the neighborhood boys. For our backyard, I wanted something a little more finished. seeing that the fort would be a focal point of the backyard.

First, we considered buying one of the playhouses we saw advertised in a gardening magazine, but these were too expensive. Next, we looked at some pre-built playhouses that you purchased and installed yourself. While these were less expensive, they looked too cute for our boys. Also, they were built for a flat property and would not work on our slope.

At this point, my husband decided to build one from scratch. We started doing some research for similar structures that we could modify, like the ones we found here:

http://www.freeww.com/storagebuildings.html

These different plans provided some good ideas that we could adapt to our needs. Here are some of the unique aspects of our fort:

1. Our fort has a dirt floor to discourage the groundhogs in our neighborhood from nesting underneath.

2. Given the absence of a floor, the foundation of our fort is made of bricks and stones from our property that support the walls.

3. The walls of our fort are built at an angle to accommodate our slope.

4. The scale of the structure is child-sized: it is basically an seven foot cube with a five foot tall door opening.

5. The generous trim hides the less-than-perfect carpentry beneath.

6. We hung two lanterns on the front, merely for decoration.

The rest of the fort pretty much follows the standard recommendations for this type of structure, including a frame made of two-by-fours, walls made of hardboard (barn siding), and a roof made of asphalt shingle.

The entire project took about a month, mainly on weekends. The total cost of the materials was approximately $700. My husband did all of the work himself, except the cutting and installation of the walls which he did with a friend on a single afternoon.

In front of the fort, my son wanted "two round ball plants" a.k.a two boxwoods. On one side of the fort is a trellis with clematis growing and hollyhocks planted in a row.


*****

Related posts: How to Build a Sandbox, Ten Tips for Planning a Children's Garden

Saturday, December 15, 2007

Gardening Gone Wild: Fences, Walls & Paths

I just came across Gardening Gone Wild which is a blog written by a collective of passionate gardeners. They hold online "Design Workshops" where gardeners can share ideas about different topics. This month's topic is about fences and walls:

http://www.gardeninggonewild.com/?p=466

I was inspired by last month's topic on paths, an aspect of my garden that I would really like to improve this year in my own garden:

http://www.gardeninggonewild.com/?p=457

Friday, December 14, 2007

Heirloom Gardener Magazine

I just found out about Heirloom Gardener Magazine, which has no relation to this blog:

http://theheirloomgardener.com/

Based upon the website, it looks like a great magazine for heirloom gardeners, primarily focused on vegetables, which makes sense given that it is published by Baker Creed Heirloom Seeds:

http://www.rareseeds.com/

As you can probably tell by my blog to date, my garden is primarily a flower garden, with a small vegetable patch. That being said, the magazine does have some articles about heirloom flowers, so I have ordered some back issues to see if I want to subscribe.

There is a review of the magazine on the following blog:

http://davesgarden.com/products/gwd/c/2875/

Heritage Rose: Flowers in December


This past weekend when it was a bit warmer, I was surprised when I took my daily walk about the garden and noticed Heritage (pictured here back in November) had a few roses opening up still. The warmth seemed to have awakened them, so I decided to cut a few for the house. The frost damaged the outer petals, but once I peeled these away, the flowers were in good enough shape to display. I can't believe its December and I still have a few roses.

Heritage has been an unbelievable bloomer. It has beautiful, big, fragrant cupped flowers and is definitely one of the stars of the David Austin rose collection. The foliage is super healthy, even during the hot, humid days of summer.

Heritage has many uses in the garden. I started Heritage in a pot on my deck where it did very well its first year but was growing taller than I wanted it to be. I find that many of the Austin roses grow a lot taller than stated with our hot summers.

I re-planted it in the Children's Garden where it has continued to grow very well. Heritage has very few thorns and offers a lot of flowers for the kids to cut for vases. Heritage also sets hips after I stop deadheading it in August which the squirrels (not the birds) eat in the fall and winter.

For more information about David Austin roses:

http://www.davidaustinroses.com/

Old Farmer's Almanac Gardening 2008 Calendar

I just got my Old Farmer's Almanac Gardening 2008 Calender. I love it. It has wonderful full color illustrations and just enough room to keep your appointments, but not take up too much space.

The best part is the gardening folklore, advice, and hints which are included each month relating to the garden chores, weather, and plants expected that month. On the last page is listed the planting times for an array of vegetables according to your region of the country. The calender also includes a preview of the gardening article for the month which can be read on the Farmer's Almanac website.

Related post: Old Farmer's Almanac Spring Planting Schedule; How to Build Raised Vegetable Beds; and Raised Vegetable Beds - Organically Preparing the Soil for Planting

Garden Planning Before the Catalogs Arrive

In the winter, the garden looks so bare that despite the pictures I've taken from the growing season it's hard to believe that it will all spring back again as full as it was. By January, my memories are clouded and I find myself circling way too many 'must buy' plants for the spring. Beguiled by the beautiful pictures and descriptions, in April you can find me on my porch surrounded by boxes of precious cargo wondering "Where am I going to put all of these?" In addition, I can't help but make forays to the local nurseries adding to my conundrum.

So, last winter I formed a plan to review all the pictures and notes I took during the year. This helped me see gaps in the plantings and under performers. It also reminds me of areas that I can layer the plantings to extend the show. For example, oriental poppies take up a lot of space, but bloom for only a short time and their leaves die back soon afterward. So, I cut the leaves back after they bloomed and plant Abyssinian glads around them. In mid July, the Abyssinian glads begin to bloom. By the time the poppies reemerge in the fall, the glads are ready to be dug up for the winter.

I love to cut flowers to bring in the house or give as gifts. At this time I also think about what plants did I wish I had more of or were there times when I didn't have much for cutting. I also keep track of where I like to plant dahlias and glads which are great cut flowers and add beauty to the garden.

Pictures also help to jog my memory as to where self seeders will fill in the garden, so I don't order plants expecting them to take spaces I've reserved for nature's gifts. In many of my gardens I allow one self seeder to provide an accent: in the front border it's verbena bonariensis; Queen Anne's lace in the Cutting Garden; around the oak in the front garden its cerinthe major; forget-me-nots in the Bird Garden; and annual black eyed susans in the Egg Garden.

Every year I have movers and those to be removed. The movers are either unhappy where they are; I don't like where they are; or their neighbors don't like them. These are listed and I note where they are moving to so that I don't re allot that space to a new purchase. Plants which will be divided are put on this list too because some of the divisions can be used to fill empty areas. Under performers or plants tried, but not liked, are slotted for removal.

At this point I should have a good list of planting spots to think about as I approach my spring order. From then on I keep a master list of all my orders and exactly where they are going. Once the boxes arrive it is quick and easy to plant them where they belong and I can prepare the planting areas ahead of time. This system works pretty well. Yet, there's always room for one more.

How do you plan your ordering? Please share any ideas that you have.

Friday, December 07, 2007

Creating the Rose Garden with a Central Brick Path

After we established the Cutting Garden, there was a narrow portion of our property behind it and next to our deck that was another relatively unused portion of our yard, measuring approximately fifteen feet wide by thirty feet long.

Because this space had full-sun, I thought it was the perfect place for a rose garden. While I have roses in almost every part of the garden, a dedicated rose garden would provide more space for all of the roses that I wanted to grow.

The first picture is taken from the steps of the Cutting Garden looking down the path of the Rose Garden to the Children's Garden.

The main structural element of the Rose Garden is the brick path that you see running through the center. I actually installed the brick path myself, which was a tremendous amount of work that I'm not sure I would want to do again.

After we established the path in the summer, we started to prepare the beds for planting the roses. In the fall, we put down newspaper to kill the grass and covered it with a thin layer of organic matter. In the spring, we dug in significant amounts of composted cow manure and mushroom compost. Then, we planted the roses.

Inspired by the Cranford Rose Garden at the Brooklyn Botanical Garden, I knew that I could fit a lot of roses into a limited space. We now have twenty-seven different roses in the Rose Garden, as well as bulbs and perennials.

Some of the roses are grown on tutuers. The three pictured were purchased from the New York Botanical Garden, which has the best gift shop of all of the gardens I visit:

http://www.nybgshop.org/

For pictures of the Rose Garden in season, click here:

http://heirloomgardener.blogspot.com/2008/01/rose-garden-in-spring-summer-daffodils.html

For information on the creation of the Cutting Garden, see this post:

http://heirloomgardener.blogspot.com/2007/11/creating-space-for-garden.html

Gardening with Children: Creating the Children's Garden

This is a picture of the Children's Garden looking up the hill in winter. Beyond the Children's Garden is the Rose Garden and beyond the Rose Garden is the back gate to the Cutting Garden.

The Children's Garden includes beds that I help the children plant and cultivate: three raised vegetable beds, for which my oldest son (age eight) is the primary gardener, and one flower bed, for which my older daughter (age ten) is the primary gardener.
The boundaries of the Children's Garden were created by installing a post and rail fence within the backyard.

Given the placement of the garden and to allow for maximum play, it has three openings: one to the Rose Garden, another to the Great Lawn, and the third next to the Long Border. The Great Lawn and the Long Border are hyperbole, as the Great Lawn is small and the Long Border is short.

Complicata Rose Hips

Complicata is one of my favorite roses. Complicata is covered with rose hips in the winter, as you can see in these two pictures.

For more information about Complicata, including pictures of her flowers, see my prior post:

http://heirloomgardener.blogspot.com/2007/11/tbd_25.html

Winter Garden Highlight: Annabelle Hydrangea


The distinctive white blooms of the Annabelle hydrangea turn green in the summer and brown in the fall. Even after the frost, as you see in this picture with the snow on the ground, they continue to hold some dried blooms that provide interest in winter. On my property, this hydrangea happily grows on a shady hill beneath white pines.


Wednesday, December 05, 2007

Brooklyn: Private and Public Gardens

I was bitten by the gardening bug when I lived in Brooklyn Heights. Brooklyn Heights is a wonderful neighborhood next to the Brooklyn Bridge across the river from lower Manhattan. It is mostly made up of four to five story brownstones, many of which have front and/or back yards. As you get to know people in the neighborhood, they invite you into their homes and--in the warmer months--their private gardens. In the big city, these are private respites, small green spaces full of beautiful plants, and the perfect place to entertain. If you are not fortunate enough to have friends in the neighborhood, there are several public gardens that will give you a feel for what is behind the brownstones.

These are not formal Botanical Gardens, but rather green public spaces that are integral to their neighborhoods. Here are some suggestions:

*Brooklyn Heights Promenade (a great playground, as well as a tourist attraction for the view of Manhattan) - Brooklyn Heights

*Carroll Park (a neighborhood park with a playground and sprinklers in the summer months) - Carroll Gardens

*Cobble Hill Park (another neighborhood park with a small playground and a great Halloween parade for children) - Cobble Hill

In addition to the aforementioned, these two spaces are not public, but you could certainly visit them if visiting the church or buying a cup of coffee:

*Oratory Church of St. Boniface (the enclosed garden is sublime) - Downtown Brooklyn

*Sweet Melissa Patisserie (eat in the garden out back) - Cobble Hill

Tuesday, December 04, 2007

Russell's Cottage Rose

Russell's Cottage Rose is one of many old roses in our garden. It is a hybrid of R. multiflora which can be grown as a shrub (as I do) or a pillar. This rose covers itself in June with these beautiful blossoms adding a rich Damask rose scent to the garden. It is one of the easiest roses to grow. It needs very little care to remain healthy and vigorous, although I do fertilize it, prune out deadwood, and shape it after its bloom to keep it the size I want.

Star of the Republic Rose

This is one of the new roses I tried last year from Antique Rose Emporium. It is one of their pioneer introductions which are supposed to be remontant, healthy, and vigorous. It is all that and more.

I almost pulled it out at the beginning of the season because rabbits had eaten all its leaves and I thought it would not survive. Also, I checked the Antique Rose Emporium website (http://www.antiqueroseemporium.com ) which described the rose as orange, a color I don't care for in roses. But, I hesitated and left it there. I am now glad that I did.

The roses are beautiful and the shrub is healthy. As it turns out, Star of the Republic is incorrectly described as orange. Although, roses can bloom in slightly different colors depending on soil and exposure, I cannot see how this lovely pink-apricot color could ever be described as orange. In addition, it grew to about four feet -- out of reach for the rabbits.

Monday, December 03, 2007

Japanese Beautyberry

The first picture shows what the Japanese Beautyberry is known for: its distinctive purple berries that appear in autumn and persist into the winter.

The second picture shows what the plant looks like in the summer, on the lower left, beneath the Pee Gee hydrangea.

I like these two stages of the plant, but am less fond of its other stages: the early spring when it looks dead and is late to leaf out; and the autumn when the leaves droop and look lifeless for about a month before they fall off.

They are healthy and vigorous plants. I purchased very small plants and they grew quickly in the first year. Next year, I am cutting them back to six inches off the ground in early spring to avoid the first problem. Further, I keep moving them around my property in hopes of finding the perfect place to enjoy them, and they are not bothered by this.

For fall and winter arrangements, you can cut the branches with the Beautyberries. If you do so when they still have leaves, I recommend that you remove the leaves because they droop immediately after being cut.

***

Click here for a follow-up post on propogation: http://heirloomgardener.blogspot.com/2008/02/japanese-beatyberry-unexpected.html

Blackberry Lily Seedheads

I love splashes of orange in the garden. My blackberry lily has small orange flowers with red dots. There is another cultivar that is yellow. They do not look like lilies. Unfortunately, I don't think I took a picture of the flowers. I have to remember to take some pictures of them next year.

The blackberry lily blooms at the end of July over several weeks. The flowers and seed heads make great cut flowers for arrangements.

These lovely seedheads develop in autumn. The first picture shows the immature pods. The outside becomes brown and papery. They break open to reveal the luscious blackberry seedheads. Resist temptation: do not eat them. The seedheads persist into winter. They will drop and produce more plants the following spring.

Although it does self seed, it is not prolific and gives a more natural look to the garden. The seedling take one to two years to reach blooming size. Note: they are deer resistant.

Container Gardening: Winter Containers

Yesterday, before today's snow, I replanted all my planters in the front garden for the winter. I love having something beautiful to look at when most of the garden is sleeping. For inspiration this year, I looked at some photographs I took at the Missouri Botanical Garden (http://mobot.org/) last winter.

The first pot has a yellow twig dogwood as its base. From there, I added boughs of white pine and dried hydrangea blossoms from a Pee Gee hydrangea in the garden.

On the front porch is an urn whose plantings change every season. For winter, I have cut branches of winterberry surrounded by dried statice and white pine branches. Also, added are some large pine cones from a collection my husband and I have gathered over the years.


Near the lamp post is a small pot atop a column which has Douglas fir clippings, some faux winterberries, and pine cones. Since this pot is in a more exposed position than the one on the porch, in the the past I have found that real winterberries do not hold up as well.


The last pot I did is in front of the living room. In the center of the pot are branches cut from a red twig dogwood surrounded by more Douglas fir branches. A few pine cones were added also.

The pots will add interest to the garden until spring comes and are easy to do. You can use cuttings from your own garden, buy some from local nurseries, or from White Flower Farm (http://www.whiteflowerfarm.com/) who sells a wonderful 14 pound box of winter greens.

Saturday, December 01, 2007

Vegetables and Herbs: How to Build Raised Vegetable Beds (on a Slope/Hill)

In my children's garden, my children and I grow vegetables in addition to flowers. For the last two years, we used the same raised bed construction that I used in the side garden:

http://heirloomgardener.blogspot.com/2007/11/creating-space-for-garden.html

These were short raised beds constructed with six inch wide ipe wood. You can see a picture of one of these beds below from last summer with heirloom lemon cucumbers:


The rabbit fencing around the cucumbers was to keep the resident groundhog from eating the cucumbers in the same way he did the tomatoes.

Towards the end of the summer, we visited New York Botanical Garden's Home Gardening Center (http://www.nybg.org/hgc_online/hgc_onsite/) and were inspired by their raised beds that were significantly taller than the ones we had constructed. Thus, once we had harvested the last of our cucumbers and zucchinis, my husband deconstructed the old beds and built the new ones you see below:


Ipe was too difficult to work with and costly, so we made these out of cedar wood. We purchased standard six by one inch, un-treated ten foot planks and had them cut in half. Each box (two of three are pictured) is made of three planks on three sides and four planks on the fourth side because our entire property is on a slope. Two additional boards are placed on top on either side to create a place where you can sit, place tools, or when the vegetables have grown, stand.

We filled the bottom of the boxes with compostable garden waste. On top, we added a mix of composted cow manure, Bumper Crop and top soil. Then, to protect the soil, we sowed a cover crop of winter rye that I purchased from Johnny's Seeds (http://www.johnnyseeds.com/). The winter rye will be turned over in the spring adding even more organic material to the soil.

The overall result was a neater looking garden that will hopefully produce an even more robust crop next year.

*****

For a follow-post on organically preparing the soil for planting, click here:
http://heirloomgardener.blogspot.com/2008/03/raised-vegetable-beds-organically.html

Ballerina Rose Hips


In my prior post about Ballerina, I wrote about her all-purpose qualities that have won her many places throughout my garden. In addition to what I previously wrote, I went out into the garden today and took the attached pictures of her cute little hips that provide winter interest and food for the birds.

For my prior post and pictures of Ballerina's flowers:

http://heirloomgardener.blogspot.com/2007/11/ballerina.html


Crabapple Tree in Winter

The crabapple tree in the Egg Garden is one of my favorites. Previously, there was a Japanese maple in the same location that died, so I decided I wanted something with spring flowers and winter interest. The crabapple tree is just perfect. In the spring it's covered with white, sweetly scented flowers. For fall, the leaves turn yellow and drop to reveal gorgeous red fruits which the birds eat all winter.


Hydrangea Wrapped For Winter

When I moved into my home, there was a hydrangea by the lamp post that produced no flowers. I knew that the deer were eating it regularly. So I began a successful regiment of deer spraying, only to find that each winter it also got killed to the ground. I find that in my Zone 6b garden hydrangea are frequently only root hardy which means that the stems are prone to being killed by the cold. Since this hydrangea only flowers on old wood it produced no flowers--it was just a foliage plant.

That fall I asked my husband to wrap it in burlap and cover it with oak leaves. I asked him to do it too late and we ran out of leaves, so we only protected the lower half of the plant. This year we got a few flowers. For the first time I saw they were mopheads with pink sepals edged in white. I asked my husband to start earlier and we covered the entire plant. He wrapped burlap around three bamboo stakes and stuffed it full of oak leaves, covering it entirely to about four feet high. Hopefully next year, the whole plant will produce flowers.